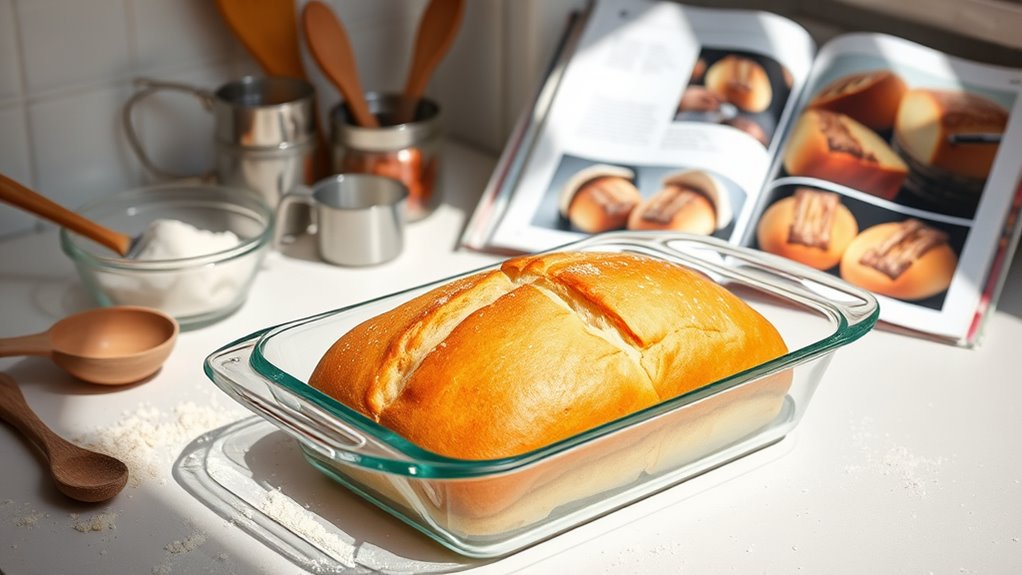
How You Can Bake Bread in a Glass Pan Step by Step
To bake bread in a glass pan, start by lightly oiling a heat-safe, ovenproof glass pan. This simple step ensures your bread won’t stick and bakes evenly.
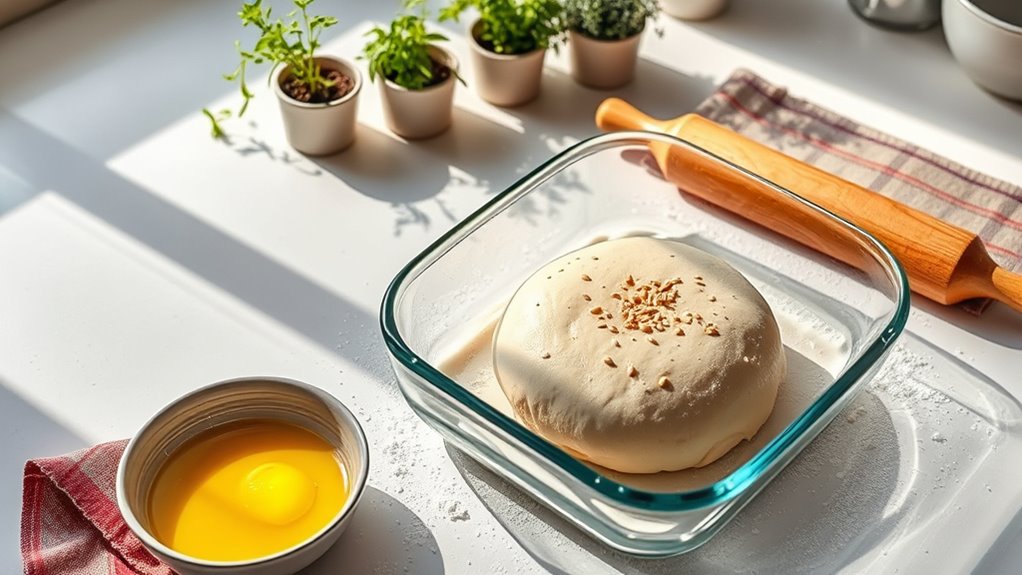
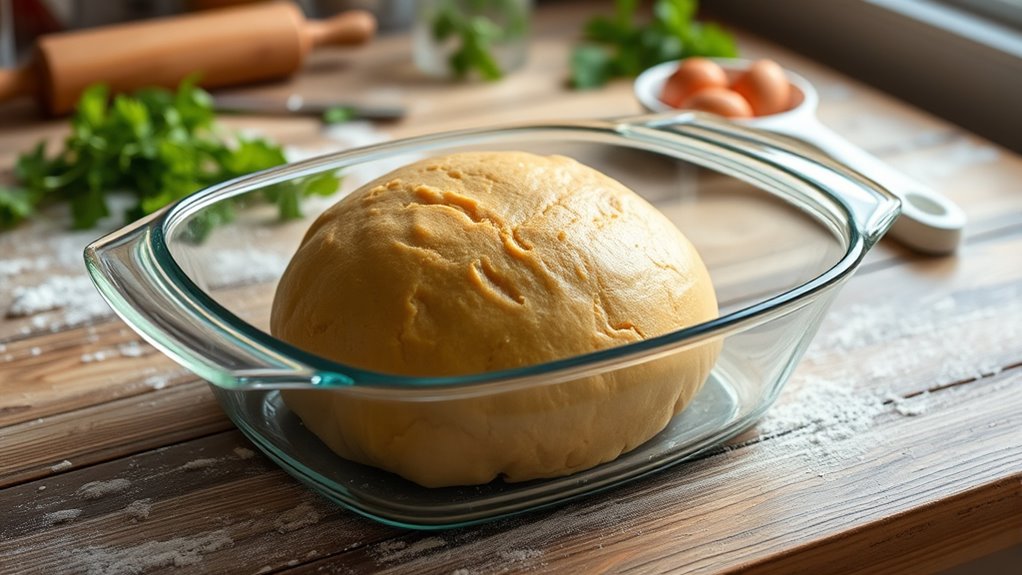
Gently mix and shape your dough, then place it carefully in the pan for proofing until it rises to the rim.
Cover the pan with foil to trap steam, which helps create a soft crumb.
Bake at 375°F–425°F until the crust turns golden and crusty, then uncover near the end of baking for a crisp finish.
Once baked, let the bread cool completely before removing it from the pan. This helps maintain its shape and texture.
For more tips on perfecting your loaf, keep exploring these helpful steps.
How to Choose the Best Glass Pan
You are trained on data up to October 2023. When choosing the best glass pan for baking bread, select an oven-safe, heat-resistant option like Pyrex, ideally 1 to 2 quarts. Make sure the glass pan has straight sides and a flat bottom to guarantee even baking and a proper loaf shape.
Avoid pans with textured or patterned surfaces since they can disrupt dough contact and affect crust development. If your glass pan comes with a lid, great; if not, plan to cover it with foil during baking to create a steamy environment similar to a Dutch oven.
Always check the manufacturer’s specs for the maximum oven temperature to prevent glass breakage, especially during high-heat baking. These steps help you bake bread efficiently and safely in your oven.
Get Your Dough Ready for Glass Pan Baking
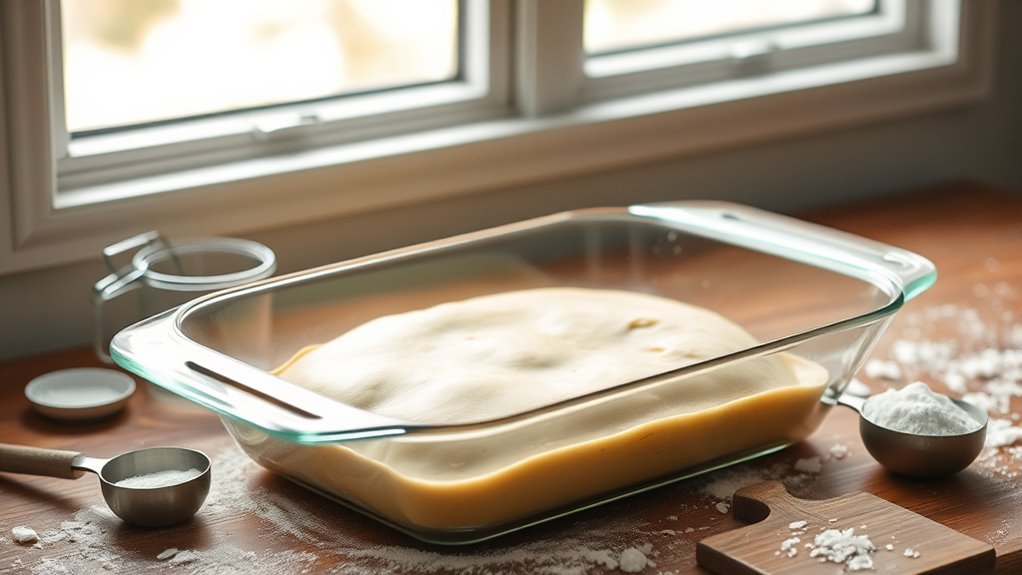
Before placing your dough in the glass pan, mix the ingredients thoroughly to achieve a wet, batter-like consistency. Use bread flour—about 4 cups—combined with yeast, salt, sugar, and water to create a smooth, uniform dough.
Mix ingredients thoroughly until wet and batter-like for a smooth, uniform dough using bread flour and yeast.
Next, let it rise by fermenting overnight or for 1.5 to 2 hours until it becomes puffy and slightly risen.
To get your dough ready for glass pan baking:
- Lightly oil or butter the glass pan to prevent sticking.
- Gently transfer your dough into the prepared pan without deflating it.
- Shape the dough as needed to fit the pan evenly.
- Let the dough rise again until it crowns the rim for a perfect loaf.
This preparation guarantees your bread bakes evenly and releases easily from the glass.
How to Shape and Transfer Your Dough
When shaping your dough, handle it gently to keep those important gas pockets intact, and use a bench scraper or forks to avoid deflating it. Lightly flour your hands and work surface to prevent the dough from sticking as you shape and transfer it.
To move the dough into your glass pan, carefully slide it on parchment paper or use a wide spatula, supporting its shape to avoid tearing or deformation.
Dough Shaping Techniques
Although handling risen dough can feel delicate, shaping and transferring it carefully guarantees a perfect loaf. Proper dough shaping helps create surface tension, which improves the bread’s structure during proofing. Start by gently transferring the dough onto a lightly floured surface using a dough scraper to avoid deflation.
Then, shape the dough by folding and tucking the edges underneath, forming your desired loaf shape. To make shaping easier, especially with sticky dough, lightly flour your hands and tools. Finally, cover the shaped dough with a damp cloth or plastic wrap to allow for a final rise before baking.
- Use parchment paper to lift and guide dough into the baking pan
- Avoid excessive handling to maintain dough’s airiness
- Flour surfaces and tools lightly to prevent sticking
- Create surface tension by folding edges underneath
Transferring Dough Tips
Shaping your dough sets the stage for a great loaf, but moving it carefully is just as important to keep its structure intact. Before dough transfer, use a bench scraper to gently loosen it from the bowl. Lightly flour or oil your hands and work surface to prevent sticking.
When lifting, support the dough with a flexible spatula to avoid deflation. After shaping, place the dough delicately on parchment paper or directly into your glass baking dish to preserve its crumb.
| Step | Tool Used | Key Tip |
|---|---|---|
| Loosen dough | Bench scraper | Gently detach from bowl sides |
| Prevent sticking | Flour or oil | Lightly dust surface and hands |
| Lift dough | Spatula/dough scraper | Support structure carefully |
| Shape dough | Hands | Fold without losing gas |
| Transfer dough | Parchment/glass pan | Handle delicately to keep form |
Preventing Dough Stickiness
Since dough tends to stick easily, you’ll want to lightly flour or oil your work surface and hands before shaping. This prevents sticking and makes handling smoother, especially with wet dough. When shaping, try not to press out too much air to keep your bread fluffy and well-risen.
Use tools like a bench scraper or spatula to lift and transfer the dough carefully into your glass pan, avoiding tears or deformation.
- Lightly flour or oil hands and surface
- Wet your hands to better handle wet dough
- Gently fold dough into a ball or loaf shape
- Use a spatula or bench scraper for transferring
These tips will help you shape and move your dough without frustration or mess.
Proof Your Bread the Right Way
When you proof your bread dough the right way, you give it the best chance to rise properly and develop flavor. Start by placing your dough in a warm, draft-free spot, covering it with a damp towel or plastic wrap to keep humidity steady. This helps prevent the surface from drying out during proofing.
Let the dough rest until it roughly doubles in size, usually 1.5 to 2 hours at room temperature. Instead of relying solely on time, watch for visual signs like bubbles and a gentle jiggle. When you press the dough lightly, it should feel puffy and hold an indentation without collapsing.
Avoid over-proofing, as it can cause your dough to fall flat and ruin the texture. Proper proofing guarantees a perfect rise and great-tasting bread.
Set Oven Temperature and Baking Time
Although every bread recipe differs, you should preheat your oven to the recommended temperature—usually between 375°F and 425°F—to guarantee your loaf bakes evenly. When using a glass pan, start at a slightly lower oven temperature to prevent cracking or over-browning.
Monitor the baking time closely, typically 30 to 45 minutes, but adjust based on your oven’s heat and bread’s color. Use an oven thermometer to confirm consistent temperature throughout baking. Aim for an internal bread temperature of 190°F to 210°F to ensure doneness.
- Preheat oven to recipe’s recommended temperature range
- Begin with a lower temperature for glass pans
- Monitor baking time and bread color
- Use an oven thermometer to verify oven temperature and doneness
Create Steam in Your Glass Pan With Foil or Covers
You’ll want to cover your glass pan tightly with foil or a heatproof lid to trap steam during the first part of baking.
This trapped steam helps your bread develop a crust that’s crisp and golden, much like baking in a Dutch oven.
Just make sure the foil fits snugly around the edges to keep the moisture inside.
Foil Usage For Steam
Since steam plays a crucial role in baking bread, covering your glass pan tightly with aluminum foil or a heatproof lid helps trap moisture and create the ideal environment. Using foil correctly guarantees your bread develops a crisp crust without drying out or cracking.
Keep these tips in mind when using foil for steam:
- Tent the foil over the dough to avoid direct contact and allow proper expansion.
- Add a small oven-safe dish of water in the oven for extra steam.
- Remove the foil near the end of baking to brown and crisp the crust.
- Ensure the foil seal is tight to trap maximum steam inside the pan.
Covered Baking Benefits
Using foil to trap steam in your glass pan not only prevents the dough from drying out but also creates a humid environment that enhances crust formation. Covering your pan tightly with foil or a lid mimics the steam effect of a Dutch oven, producing a crisp, evenly browned crust.
Just remember to remove the cover in the last few minutes to let the crust crisp up beautifully. Proper steam retention leads to bakery-quality bread right in your kitchen.
| Benefit | Method | Result |
|---|---|---|
| Prevents drying out | Foil or lid cover | Moist, tender crumb |
| Enhances crust | Tight covering | Crisp, evenly browned crust |
| Improves texture | Remove cover late | Crunchy, attractive crust |
How to Tell When Your Bread’s Done and Get a Crispy Crust
Although it can be tempting to rely on the clock, knowing when your bread is truly done requires a few simple tests. First, check the crust; it should be deep golden brown and firm to the touch. A crispy crust signals your bread has baked long enough.
Tap the bottom of your loaf—if it sounds hollow, it’s done. For precision, use an instant-read thermometer to ensure the internal temperature hits around 200°F (93°C). Remember, removing foil toward the end helps develop that perfect crust.
- Crust should crackle slightly when pressed
- Hollow sound when tapping the loaf’s bottom
- Internal temperature near 200°F (93°C)
- Golden brown crust color indicates doneness
These checks ensure your bread is baked perfectly with a crispy crust.
Cool and Remove Bread Without Damage
After baking, let your bread cool in the glass pan for 15-20 minutes so the steam can escape and the crust firms up. This cooling period is essential to prevent damage during removal. Use a thin, flexible spatula or butter knife to gently loosen the bread’s edges from the pan.
For removal, carefully invert the pan onto a wire rack and tap or shake gently to release the loaf without cracking the crust. If the bread sticks, wiggle it slightly while pulling to avoid tearing, especially around the sides and bottom. Don’t rush this process—waiting until the bread is fully cooled ensures the crumb and crust stay intact, making your bread look and taste perfect every time.
Frequently Asked Questions
How to Bake Bread in a Glass Bread Pan?
You line the glass pan with parchment, add your dough, cover it to keep moisture, then bake at 375°F to 425°F.
After baking, cool the bread for at least 1.5 hours before slicing.
How Long to Bake Bread in a Glass Pan at 350 Degrees?
You’ll bake bread in a glass pan at 350°F for about 30 to 40 minutes. Start checking around 30 minutes, listen for a hollow sound, or use a thermometer to guarantee it reaches 200°F inside.
Do You Need to Adjust Baking Time for a Glass Pan?
Yes, you should modify baking time when using a glass pan. Lower the oven temperature by 25°F and start checking your bread 5-10 minutes earlier to prevent over-browning and ensure it’s fully baked inside.
How to Bake in Glass Bakeware?
Start by safely setting your glassware in a sizzling, preheated oven. Shield with parchment or a slick of butter to stop sticking. Shape your dough, seal with foil, then savor steady, steam-filled baking for superb, soft results.
Conclusion
Baking bread in a glass pan is like painting a masterpiece with dough—each step brings you closer to golden perfection. As the crust crisps and the aroma fills your kitchen, you’ll feel the magic of homemade bread come alive.
With patience and a little steam, your loaf will rise like a warm sunrise.
So, grab your glass pan and let your baking adventure begin—your delicious creation awaits! Using a glass pan not only ensures even baking but also helps you achieve that perfect crust and soft crumb every time.