
How You Can Make Sourdough Bread in a Loaf Pan
You can make sourdough bread in a loaf pan by preparing a well-hydrated dough with an active starter. Start by shaping it into a tight log that fits your greased pan, ensuring the dough is ready for the best rise.
Proof the dough until it nearly doubles and passes the gentle poke test. This step is crucial for developing the perfect texture and flavor.
Bake at around 200°C, covered initially to trap steam for crust development. Then, uncover the bread to allow browning and achieve a beautiful crust.
Mastering these steps guarantees a tender crumb and good rise. Keep exploring to perfect your approach and troubleshoot common issues for consistently great sourdough bread.
Benefits of Baking Sourdough in a Loaf Pan
While you can bake sourdough free-form, using a loaf pan gives your bread a uniform shape that’s perfect for sandwiches and toast. When you use a loaf pan, it supports your sourdough loaf during proofing and baking, so you don’t need advanced shaping skills. This support helps achieve consistent oven spring, resulting in a well-risen bread with a classic bread shape.
Baking in a loaf pan also creates a softer crust on the sides and bottom, giving you a tender crumb that’s easy to slice. Plus, you can bake at a lower temperature—around 200°C (392°F)—which simplifies your home baking setup by avoiding specialized equipment like Dutch ovens. Overall, the loaf pan makes baking approachable, producing a practical, easy-to-handle sourdough loaf every time.
Choosing the Right Loaf Pan Size and Material for Sourdough
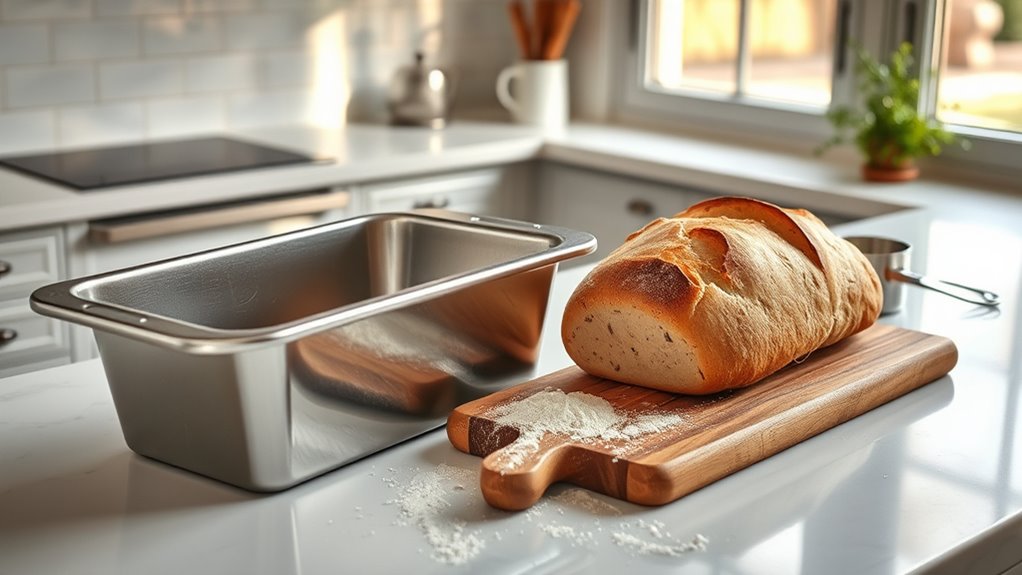
Using the right loaf pan size and material can make a big difference in how your sourdough bakes and performs. Standard pans measuring 8×4 or 9×5 inches work well for most sourdough recipes, shaping the bread uniformly and fitting nicely in your oven.
Metal pans like aluminum or stainless steel heat evenly, enhancing crust development, while glass pans let you watch the bake. Non-stick pans ease bread release, but uncoated pans need butter or flour to prevent sticking. For larger dough batches, a 10×5 inch pan prevents overflow.
| Size (inches) | Material | Benefit |
|---|---|---|
| 8×4 | Aluminum | Even heat, good crust |
| 9×5 | Glass | Visual bake monitoring |
| 10×5 | Stainless Steel | Larger batches, durable |
Preparing Your Sourdough Dough

Start by selecting quality flours and an active sourdough starter to create your dough’s foundation. Mix your ingredients until the dough feels shaggy, then let it rest during autolyse to develop gluten naturally.
You’ll also perform stretch and fold sessions to strengthen the dough before shaping and proofing.
Ingredient Selection Tips
Because the quality and balance of your ingredients directly affect the dough’s texture and flavor, selecting them carefully is essential when preparing sourdough. Use an active starter at about 50g and adjust water between 350-375g to maintain proper hydration around 80%. Opt for bread flour combined with whole wheat and all-purpose for a high-hydration dough, which helps gluten development and yields a tender crumb.
Don’t forget 10g of salt for flavor and structure. After mixing into a sticky dough, an autolyse of about 1 hour improves extensibility, making shaping easier for your loaf pan.
| Ingredient | Purpose |
|---|---|
| Active Starter | Fermentation & rise |
| Bread Flour | Strong gluten structure |
| Salt | Flavor & gluten strength |
| Water (Hydration) | Dough softness & crumb |
Mixing And Folding
Once you’ve combined the sourdough starter with water, mix in the flours until a shaggy dough forms. This initial mixture needs hydration to kickstart gluten development, so let it rest for about an hour.
Afterward, perform a series of stretch and folds every 15-20 minutes over the next two hours. Each time, lift the dough’s edges and fold them into the center to build elasticity. These folds strengthen the dough’s structure, encouraging better fermentation and proofing.
Keep folding until the dough becomes smooth, bubbly, and noticeably increases in volume—signs that fermentation is well underway. This process ensures the dough has the right hydration and gluten network, essential for a light, airy crumb in your sourdough bread baked in a loaf pan.
Resting And Autolyse
Although it may seem like just waiting, autolyse plays a crucial role in preparing your sourdough dough by mixing flour and water and letting it rest for 30 minutes to an hour. This resting time allows proper hydration of the flour, activating enzymes that improve gluten development and enhance dough elasticity.
During the autolyse process, you don’t add salt or starter yet, which helps create a more extensible dough that’s easier to shape. After autolyse, you incorporate the sourdough starter to kickstart fermentation on a well-hydrated base.
This method reduces kneading time and promotes better crust formation and crumb texture. Embracing autolyse ensures a stronger dough structure and richer flavor, setting you up for a delicious loaf in your pan.
Shaping Your Dough for the Loaf Pan
Start by gently stretching your fermented dough into a rough rectangle on a floured surface. Then, roll it tightly into a log and pinch the seam closed to keep its shape.
Finally, place the dough seam-side down into a greased or floured loaf pan, ready for proofing.
Preparing The Dough
When your dough has risen sufficiently, gently transfer it onto a floured surface and shape it into a rectangle, taking care to preserve its airy texture. For effective dough shaping, handle the dough carefully to avoid deflating it. Lightly flour your workspace to prevent sticking, especially with high-hydration doughs.
Next, roll the rectangle from one short end into a tight log, pinching the seam closed to keep it secure during baking. Place the dough seam side down into a greased or parchment-lined loaf pan, ensuring it fits snugly without gaps.
Cover the pan with a damp cloth or plastic wrap and allow the dough to undergo its final proof until it slightly crowns the pan’s rim, signaling readiness for baking.
Folding And Shaping
While the dough is still pliable, gently stretch and fold it during bulk fermentation to build a strong gluten network without losing its airiness. This folding technique promotes gluten development and traps air, essential for a light crumb.
After the initial rise, use your hands or a bench scraper to shape the dough into a tight oval or rectangle. Folding the edges toward the center creates surface tension, vital for maintaining the dough’s form.
Lightly flour your work surface to prevent sticking and aid smooth shaping. This shaping method prepares your dough perfectly before placing it in the loaf pan for proofing.
| Step | Purpose |
|---|---|
| Stretch & Fold | Build gluten, trap air |
| Lightly Flour | Prevent sticking |
| Fold Edges In | Create surface tension |
| Shape Oval/Rect | Prepare for loaf pan proofing |
Placing In Pan
After shaping your dough into a tight oval or rectangle, gently reshape it into a neat rectangle to fit your loaf pan. With proper pan preparation—either greased or lined with parchment—transfer your dough seam side down to support its structure during proofing.
Lightly flour the dough’s surface to ease dough handling, especially if it’s sticky. Once in the pan, pinch the seams closed to prevent spreading or bursting as the dough rises.
Confirm the dough fills the pan adequately without exceeding the rim to allow enough room for proofing and oven spring. If you’ve used a proofing basket earlier, handle the dough gently to maintain its shape. Just before baking, score the loaf to control expansion and create a beautiful crust.
Best Proofing Methods for Sourdough in a Loaf Pan
Although proofing sourdough in a loaf pan can be done at room temperature in just a few hours, you might prefer refrigerating it overnight for a slower, more flavorful fermentation. Proofing at room temperature typically takes 2-4 hours, allowing the dough to puff up and nearly double in size. This quick method works well if you want to bake the same day.
Alternatively, refrigerated overnight proofing slows fermentation, giving you flexibility and deeper flavor development through slow fermentation. Whichever proofing methods you choose, keep a close eye on the dough to avoid over-proofing—it should be light, slightly jiggly, and risen near the pan’s rim. Proper proofing guarantees a good oven spring and prevents the dough from collapsing before baking.
How to Bake Sourdough Bread in a Loaf Pan
How do you guarantee your sourdough bakes perfectly in a loaf pan? Follow these steps to bake sourdough bread with great crust and crumb:
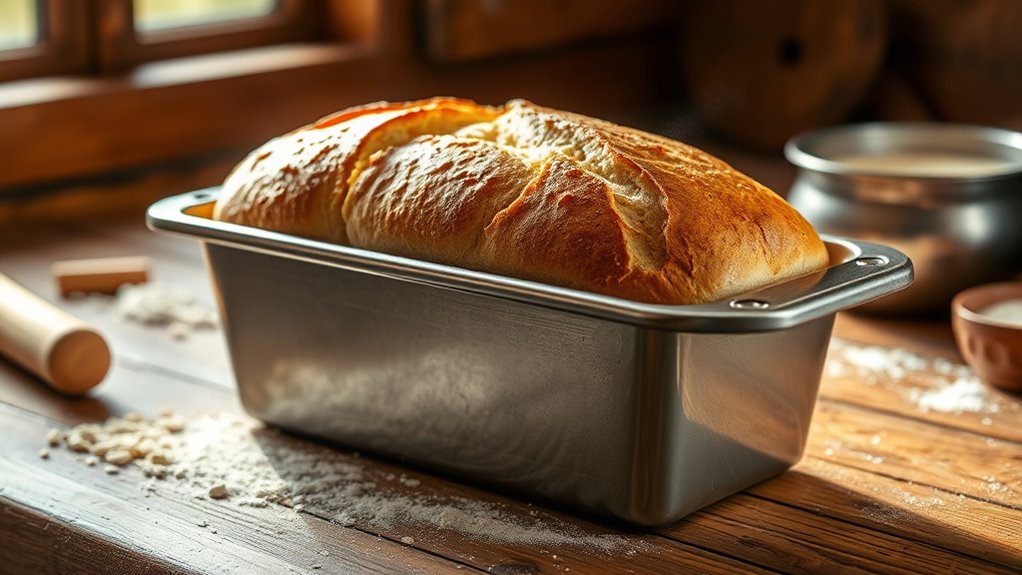
- Preheat your oven to 200°C (392°F). Grease or line your loaf pan, then transfer the proofed dough seam-side down to fill the pan evenly.
- Score sourdough’s top if you like, then cover with a lid or foil to trap steam during the initial bake.
- Oven and bake the bread in a loaf pan for 40-45 minutes. Remove the cover halfway to develop a golden crust and reach an internal temperature of about 206°F (96°C).
- Cool the bread on a cooling rack for at least 30 minutes to let the crumb set before slicing.
This method guarantees your bread in a loaf pan bakes beautifully every time.
How to Get a Perfect Sourdough Crust and Crumb
To achieve the perfect sourdough crust and crumb, you need to balance moisture, temperature, and timing throughout the baking process. Start by ensuring your proofed dough has doubled in size and feels slightly jiggly; this proper proofing promotes excellent oven spring and crust development.
Before baking, score the dough to control expansion and prevent cracking, which helps create an even, attractive sourdough crust. Bake at a high oven temperature, around 400-450°F, and use steam or cover the loaf initially to trap moisture, encouraging a shiny, thick crust and tender crumb.
Since baking in a loaf pan traps moisture, remove the cover in the last minutes to let the crust brown and firm up. This method gives you a beautifully balanced crust and crumb every time.
Troubleshooting Sourdough Loaf Pan Baking Problems
Getting the perfect crust and crumb can be tricky, especially when baking sourdough in a loaf pan. If you face issues, check these key factors:
- Proofing: Underproofed dough results in poor oven spring and dense texture; ensure your loaf has doubled and feels light. Overproofed dough may collapse—use the gentle poke test for readiness.
- Steam: Lack of steam during baking causes a tough crust. Add a water pan or cover the loaf to trap moisture.
- Pan Size & Shaping: Using a too-small pan or overcrowding leads to uneven baking and dense crumb. Choose pans that fit the dough and shape it properly.
- Oven Temperature: Too high or uneven heat burns the crust. Adjust temperature and rotate the loaf mid-baking for even results.
Master these to improve your sourdough loaf pan experience.
Frequently Asked Questions
Can You Make Sourdough in a Regular Loaf Pan?
Yes, you can make sourdough in a regular loaf pan. Just proof the dough directly in the pan, letting it rise until nearly doubled.
Then bake at 375°F–425°F for 40-45 minutes for a perfect loaf.
Can You Use a Loaf Pan Instead of a Dutch Oven for Bread?
Yes, you can use a loaf pan instead of a Dutch oven. It provides shape support, simplifies cleanup, and creates a softer crust.
However, you’ll miss the intense steam and crust crispiness a Dutch oven offers during baking.
What if I Don’t Have a Dutch Oven for Sourdough Bread?
Like crafting a masterpiece without a famous brush, you can bake sourdough without a Dutch oven.
Just use a loaf pan, create steam by covering your bread, and adjust heat for that perfect crust and crumb.
What Makes a Loaf Pan Ideal for Sourdough?
A loaf pan’s ideal because it shapes your sourdough evenly, supports the dough during proofing, and promotes uniform heat distribution for consistent crust and crumb.
Plus, it makes handling easier, especially with a non-stick or greased surface.
Conclusion
So, you’ve decided to tame wild yeast in a loaf pan—bravo! Forget free-form artistry; now you get perfect, uniform slices that scream “I meant to do this.”
Sure, sourdough baking can be a rollercoaster of sticky dough and mysterious proofing timelines, but hey, who needs spontaneity when you have a pan? Embrace the loaf pan life, and remember: if your bread isn’t perfect, just call it “rustic” and pretend it was intentional.
Happy baking! With these tips on how you can make sourdough bread in a loaf pan, you’ll enjoy consistent results and delicious homemade bread every time.